
Introduction to Electrical Works
Introduction to Electrical Works
Electrical work is often required with home improvement.
This guide will introduce you to common electrical jargon, offer practical solutions, and share essential tips and techniques to help you navigate your first involvement with electrics.
While it might seem intimidating at first, many basic tasks are well within the reach of a DIY beginner.
Understanding the fundamentals, being aware of safety precautions, and knowing when to call a professional are key to successfully managing simple electrical projects.
This guide will introduce you to common electrical jargon, offer practical solutions, and share essential tips and techniques to help you navigate your first involvement with electrics.
Understanding Basic Electrics
Large Call to Action Headline
Before diving into hands-on tasks, it’s crucial to understand some basic electrical jargon.
A. Voltage, Current, and Resistance
Voltage (V): The potential difference that drives electrical current through a circuit.
Household outlets typically supply 240V in the UK , Europe Australia & Africa and 120V in the USA/Canada
Current (A): The flow of electricity through a circuit, measured in amperes (amps).
Resistance (Ω): The opposition to current flow within a circuit, measured in ohms.
B. Circuits
Circuit Basics: Electrical circuits provide a path for electricity to flow. Circuits can be series or parallel, with parallel circuits being more common in home wiring.
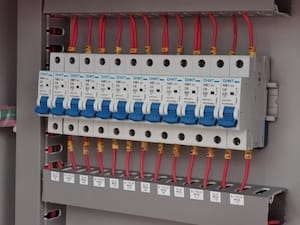
Circuit Breakers: These devices protect your home by interrupting the flow of electricity if a circuit is overloaded, preventing electrical fires.
C. Wiring Colour Codes
Standard Wire Colours: Understanding the colour coding of wires is critical.
The colour codes for electrical cables in the UK are:
• Brown: The live wire, which carries the power in a standard low-voltage domestic electrical installation.
• Blue: The neutral wire, which completes the electrical circuit and carries electricity away from the appliance.
• Green and yellow: The earth wire, which provides a protective connection to the ground.
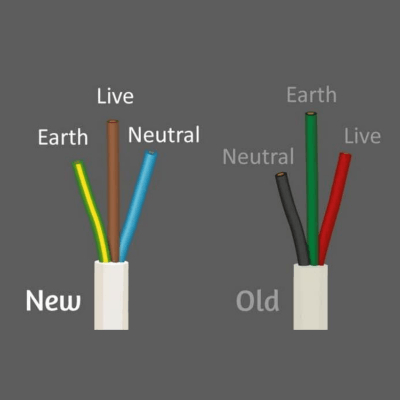
What Are the New Wiring Colours?
As you can see in the image below, the new (current) wiring colours in the UK are:
• Earth wire → green and yellow
• Live wire → brown
• Neutral wire → blue
What Are the Old Wiring Colours?
The old wiring colours in the UK still have three wires: earth, live, and neutral. However, in older wiring systems, you’ll find that the colours of these wires are different:
• Earth wire → green and yellow (but sometimes bare with no sleeve)
• Live wire → red
• Neutral wire → black
Large Call to Action Headline
In the USA /Canada
USA Wiring is a tad more complex
Black Red or BlueWires:
These are "hot" wires carrying live current.
White Wires:
These are neutral wires that carry current back to the electrical panel.
Green or Bare Copper Wires:
These are grounding wires that provide a safe path for electricity to prevent shock.
• Country-Specific Codes:Wiring colours and standards can vary by country, so be sure to familiarize yourself with local electrical codes.

Basic Electrical Tasks for Beginners
Here are some of the most common electrical projects that beginners can handle, along with tips on how to approach them safely and effectively.
It’s often a good idea to take a photograph, from your phone, of the existing wiring configuration, if you can, to familiarise yourself with the required connections. Otherwise, a small sketch will help.
Replacing Light Fixtures
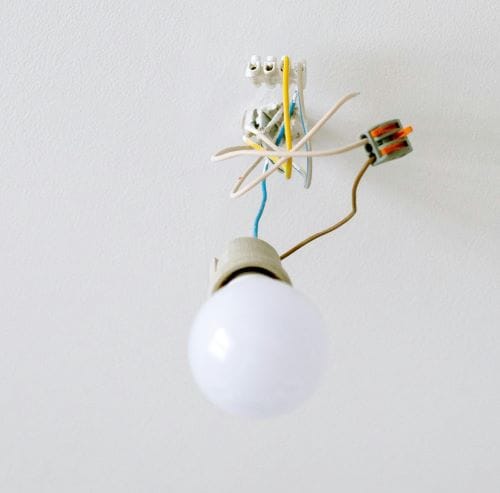
Changing a light fixture is a straightforward way to update the look of a room.
• Turn Off Power:
Always turn off the power at the circuit breaker before beginning any electrical work, not just at the switch.
• Remove the Old Fixture:
Unscrew the old fixture from the ceiling or wall, disconnect the wires, and remove it.
• Install the New Fixture:
Connect the wires of the new fixture to the existing wiring, matching the live/hot and the neutral wires.
Attach the fixture to the ceiling or wall and secure it in place
Once everything is securely connected, turn the power back on and test the fixture.
Note
You will need to be able to balance on a ladder and be handy with a screwdriver for the wired connections and the requirement for fixing the fixture back to the ceiling
Replacing Electrical Outlets
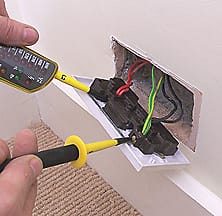
Updating old or damaged outlets is another common task that beginners can manage.
•Turn Off Power
As always, start by turning off the power at the circuit breaker.
• Remove the Outlet Cover
Unscrew the cover plate and remove the outlet from the wall box.
•Disconnect Wires
Carefully disconnect the wires from the old outlet.
•Connect the New Outlet
Connect the wires of the new fixture to the existing wiring, matching the live/hot and the neutral wires.
•Secure the outlet back into the wall box
Replace the cover plate, and turn the power back on to test the outlet.
Installing a Dimmer Switch
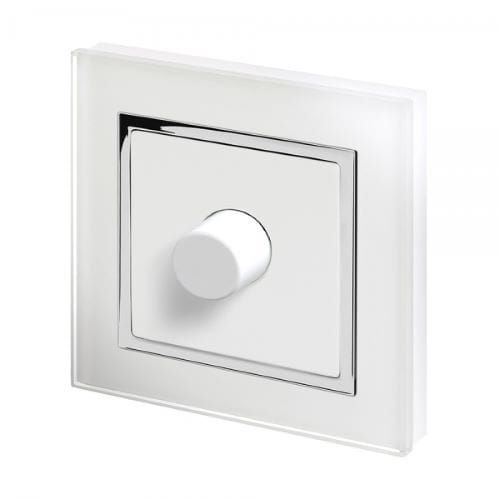
Adding a dimmer switch can enhance the ambiance of a room by allowing you to adjust the lighting levels.
• Select the Right Dimmer
Ensure you choose a dimmer switch compatible with the type of bulbs (LED, incandescent, etc.) you’re using.
• Turn Off Power
As with all electrical work, start by shutting off the power at the circuit breaker.
• Remove the Existing Switch
Unscrew the existing light switch from the wall, disconnect the wires, and remove it.
• Wire the Dimmer
Connect the wires from the dimmer switch to the corresponding wires in the wall box
• Secure the dimmer switch in the wall box
Attach the cover plate, and test it after restoring power.
Use the Right Tools

• Insulated Tools: Use insulated screwdrivers, pliers, and other tools designed for electrical work to protect yourself from accidental shocks.
• Wire Strippers: Use a wire stripper to safely remove the insulation from wires without damaging them.
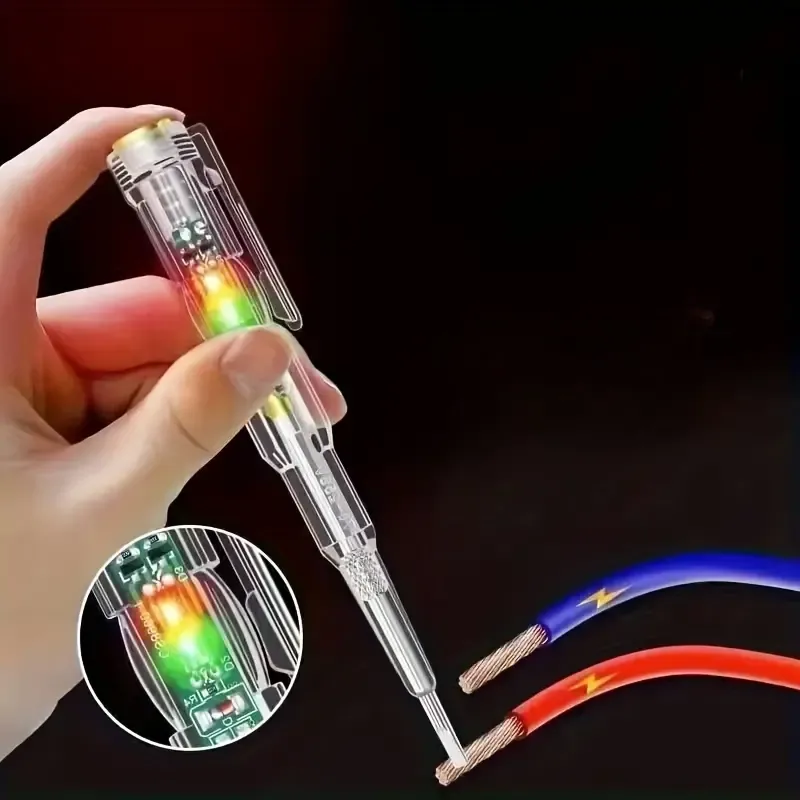
• Voltage Tester: A non-contact voltage tester is a must-have tool for checking if wires are live without touching them.
Understand Grounding and Bonding
• Grounding: Ensure all electrical systems are properly grounded to prevent electric shocks. This typically involves connecting the ground wire to a grounding rod or a metal water pipe.
• Bonding: Bonding involves connecting all metal parts that are not supposed to carry electricity, ensuring they have the same electrical potential and preventing shocks.
Conclusion
Embarking on DIY electrical work can be both empowering and rewarding, but it requires careful planning, a solid understanding of basic principles, and a commitment to safety.
By starting with simple projects like replacing outlets or installing light fixtures, you can build your skills and confidence over time.
Remember, while many tasks are beginner-friendly, knowing your limits and when to call a professional is crucial to maintaining a safe and functional electrical system in your home.
With the right approach and respect for electricity, you can successfully tackle many basic electrical projects, enhancing both your home and your DIY skillset.
Good Luck

© [your domain name]