
How to use a Hammer
How to use a Hammer

If you're new to DIY projects, learning how to use a hammer is an essential skill.
This tool is fundamental in many tasks, from hanging pictures to building furniture.
In this guide, we'll cover the basics of hammer usage and help you choose the right hammer for your projects.
Understanding Different Types of Hammers
Before we dive into the how-to, it's important to know that not all hammers are created equal.
Here are the most common types of hammers and their uses:
Claw Hammer

The most familiar type of hammer with a flat head for driving nails and a curved, forked claw for removing them.
Ideal for general household tasks such as hanging pictures, assembling furniture, and small carpentry projects.
Ball Peen Hammer
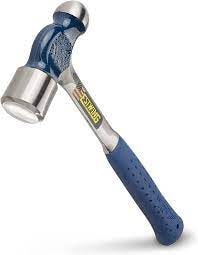
Features a rounded (peen) head opposite the flat striking surface.
Commonly used in metalworking for tasks like shaping metal and driving punches.
Sledgehammer

A heavy-duty hammer with a large, flat head.
Suitable for demolition work, breaking concrete, and driving stakes.
Mallet

Typically has a larger, softer head made of rubber or wood.
Useful for tasks requiring a softer touch, like assembling furniture without damaging the surface
Tack Hammer

A small, lightweight hammer with a magnetic head.
Designed for driving small nails or tacks into delicate surfaces such as Upholstery.
How to Choose the Right Hammer
When choosing a hammer, consider the following factors:
Match the hammer to your project.
A claw hammer is versatile and great for most household tasks, while a sledgehammer is better for heavy-duty demolition.
Heavier hammers deliver more force but can be harder to control.
Beginners might find a medium-weight hammer (around 16 ounces) easier to handle.
Handles can be made of wood, fiberglass, or steel.
Wooden handles absorb shock better, while fiberglass and steel handles are more durable.
Step-by-Step Guide to Using a Hammer
Grip the Hammer Correctly:
Hold the handle near the end for maximum leverage. Your grip should be firm but not overly tight.
Position the Nail:
Hold the nail near its head between your thumb and forefinger.
For small nails, consider using a clothespin or a piece of cardboard to protect your fingers.
Start with Light Taps:
Lightly tap the nail to set it into the material. This ensures it stands upright and reduces the chance of bending.
Drive the Nail:
Once the nail is set, increase your swing's force.
Use your elbow and wrist to control the motion, keeping the hammer face parallel to the nail head.
To Remove the Nail (if necessary):
Use the claw end of the hammer.
Slide the claw under the nail head and lever it out by rocking the hammer back and forth.
Tips for Safe and Effective Hammering
Wear Safety Gear: Protect your eyes with safety glasses, especially when working with materials that can splinter.
Use the Right Hammer for the Job:
Using a sledgehammer for small nails or a tack hammer for heavy-duty tasks can lead to accidents.
Inspect Your Hammer: Regularly check for signs of wear, such as a loose head or splintered handle, to ensure it is safe to use.
Keep Fingers Clear: Always be mindful of where your fingers are to avoid accidental hits.

By following these guidelines, you'll be well on your way to mastering the hammer.
Remember, practice makes perfect, so don't be discouraged if it takes a few tries to get the hang of it.

© [your domain name]